A fire can turn deadly fast, and in 2024 the U.S. saw about 2,920 home fire deaths. Even in early 2026 reports, people are still dying in real time when smoke and heat spread before anyone wakes up. That’s why fire detection systems and the way they’re installed matter so much.
Fire detection systems do two big jobs. First, they spot smoke, heat, or flames, then send an alert to people inside and to the building’s control panel if it has one. Next, they help trigger next steps, like paging, door release (where allowed), or emergency response. However, if you get the placement wrong, use the wrong type of device, or skip required spacing and wiring rules, you might delay that first warning.
So if you’re planning a retrofit or a new build, you’re probably asking how fire detection systems installation really works in practice. You’ll need the right system type for each space, a clear plan for wiring routes and power, and careful setup that fits the code for that building.
Ready to learn how it’s done?
Types of Fire Detection Systems You’ll Encounter in Buildings
In real buildings, fire detection is not one single device. Instead, it’s a mix of sensor types and control equipment, matched to how fires start and how people move through the space. Smoke may show up early, while heat can confirm a danger when smoke is hard to detect. For that reason, the “best” system depends on the building layout, ceiling height, and day-to-day activities.
For everyday spaces, you’ll most often see smoke and heat detectors doing the first job. Then, in larger or higher-risk buildings, you’ll run into addressable, wireless, and multi-sensor setups that can pinpoint the source faster and reduce nuisance alarms.
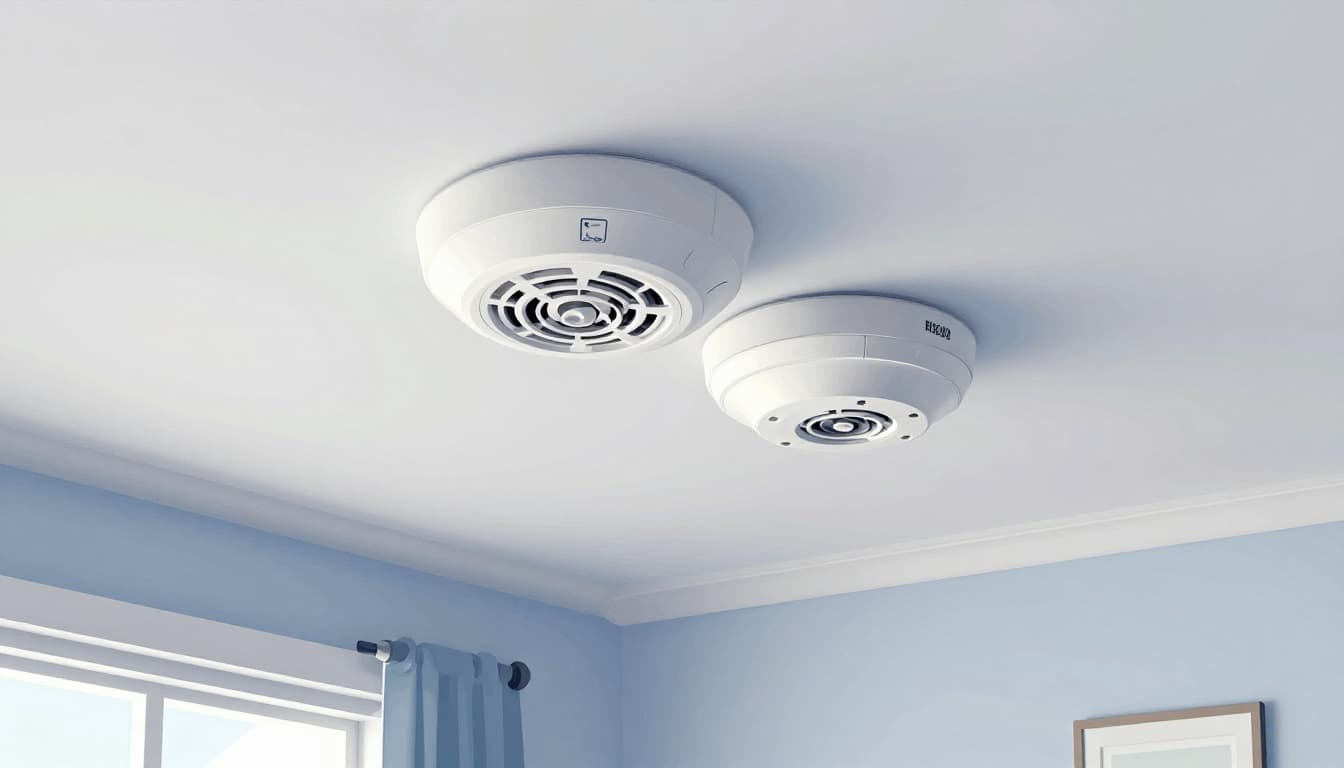
Smoke and Heat Detectors: The Basics for Everyday Protection
Smoke detectors look for tiny particles that fill the air during a fire. They use different sensing methods, so they react to different fire types. Meanwhile, heat detectors respond to temperature rise or a set temperature. They don’t rely on smoke, so they can be helpful where smoke alarms might false-trigger.
Here’s a simple way to think about it: smoke detectors are early warning, and heat detectors are confirmation.
| Detector type | How it senses | Common best fit | Typical nuisance risk |
|---|---|---|---|
| Ionization smoke | Faster-moving smoke particles | Faster-flaming fires | More nuisance near cooking (depending on placement) |
| Photoelectric smoke | Larger smoke particles as they scatter light | Smoldering fires | Less nuisance than ionization in some kitchens |
| Heat detector (fixed or rate-of-rise) | Temperature threshold or rapid rise | Garages, utility areas, kitchens (when permitted) | Fewer “cooking” alarms |
| Multi-sensor (smoke + heat) | Combines triggers | Areas needing extra reliability | Usually fewer false alarms |
In many homes, placement matters as much as the detector type. You typically install smoke alarms inside each bedroom, outside the sleeping area, and on every level, including basements. If you’ve ever wondered why the code is so strict here, it’s because many people fall asleep before a fire becomes obvious. Smoke usually reaches sleeping areas first.
Heat detectors often show up in spaces where smoke alarms get challenged by steam, cooking smoke, or vehicle exhaust. Still, you must follow local and manufacturer rules, since heat detector suitability varies by room use.
Also, don’t forget the install basics. Residential systems should include battery backups, so a dead outlet does not kill protection. When the system uses interconnection, one alarm should trigger the rest, so occupants hear a clear warning throughout the home. For a baseline on “why, where, and which,” the U.S. Consumer Product Safety Commission has helpful guidance in Smoke Alarms – Why, Where, and Which (CPSC Pub. 559) on smoke alarm placement and basics.
Finally, in 2026-focused updates, installers pay extra attention to newer detector categories and how they’re tested. For example, NFPA 72 updates include rules that push correct placement, testing, and power backup planning across many building types. If you’re upgrading or retrofitting, it’s smart to review what changed for the 2026 cycle in NFPA 72 changes for 2026.
Advanced Options Like Addressable and Wireless for Bigger Spaces
As buildings get larger, the “simple alarm” approach stops being enough. In a big office, hospital wing, warehouse, or apartment building, you need faster location clues. You also need system behavior that’s easier to troubleshoot, easier to maintain, and less likely to cry wolf during everyday conditions.
That’s where addressable and wireless systems come in.
With addressable fire alarm systems, each device reports its own “address” back to the control panel. Instead of “a detector in zone 3 went off,” you get “device 117 triggered in this area.” That precision helps crews respond sooner and reduces downtime. If you maintain older systems, you’ll also see why parts compatibility matters when upgrading. You can compare how addressable and conventional wiring architectures differ in addressable vs conventional alarm systems.
With wireless systems, you still get the same goal, but the installation can be easier in some retrofits. Installers avoid running lots of new cabling, which helps when tenants are in place or walls cannot be opened. However, wireless does not mean “no planning.” You still must follow device spacing rules, battery schedules, and the control panel’s power and supervision needs.
Meanwhile, “smart” and AI-integrated detectors focus on reducing false alarms. Many modern units use smarter signal processing, sometimes combining smoke, heat, and patterns tied to real fire behavior. Instead of treating every flame-like event as a fire, these systems try to tell the difference between safe ignition sources and runaway fire growth. This reduces nuisance alarms without weakening the response when conditions truly turn dangerous.
In addition to smoke and heat, larger buildings often use specialized sensing. For the 2026 cycle, you may hear about thermal image detectors (useful where smoke is confusing or ceilings are very high) and acoustic detectors (useful in spaces where the danger starts with gas or sound patterns). Realtime industry updates point out that these technologies come with placement and testing expectations, not just “add a sensor and go.” For many facilities, the best next step is to coordinate with a licensed fire alarm designer and follow NFPA 72 requirements for that occupancy type.
In short, advanced systems change what you install and how you manage it. They add control panels, device-by-device supervision, and often monitoring and reporting workflows. Most importantly, they help you respond with confidence because the panel can tell you where to look first. When you pick the right system type for the building, installation errors drop, and occupants get clearer warnings when it matters.
Planning Steps Before You Start Installing Fire Detection Systems
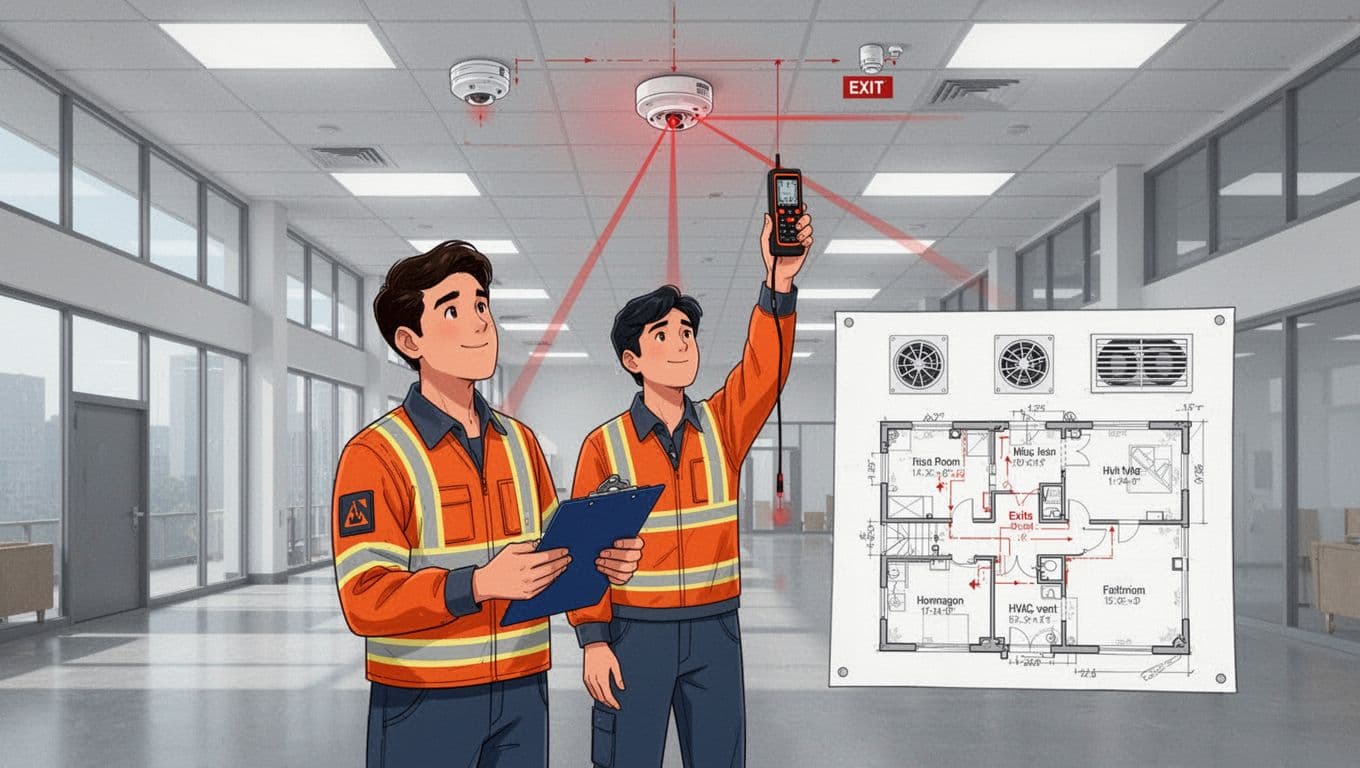
Before anyone mounts a detector, you need a plan that matches how fires actually grow in that specific building. Think of it like building a net: if you hang it in the wrong spot, it will miss the fish, even if the net is “good.”
Start with a site survey, then confirm code intent, then lock in device type and spacing. This prevents costly redo work, extra labor, and last-minute wiring changes.
Key Placement Rules to Follow for Maximum Coverage
Placement rules sound simple until you face a real ceiling, real airflow, and real obstructions. NFPA 72 is built around the idea that smoke and heat must reach the detector quickly and predictably. If you ignore the details, you might reduce coverage without realizing it.
Here are the most common placement rules installers use to get maximum coverage right the first time:
- Start with how close detectors must be to walls and corners. NFPA 72 placement guidance commonly centers ceiling-mounted spot-type detectors so they sit about 4 inches from the wall/edge they relate to. That small offset matters because air movement does not behave like a textbook diagram.
- Respect the ceiling spacing limit (and ceiling height limits). Traditional planning uses 30 feet spacing, but newer editions tied that spacing method to ceiling height. The practical takeaway is this: if your ceiling is over about 40 feet, you cannot assume the simple 30-foot grid works. You likely need performance-based planning.
- Keep detectors away from problem zones. Avoid kitchens and bathrooms when the detector type and installation method would face steam or heavy nuisance conditions. Also, do not place near areas with strong drafts (supply air jets, return grilles, or turbulent airflow pathways) because they can push smoke past the sensor.
- Control the impact of HVAC. Supply diffusers and return paths can dilute smoke, thin it out, or move it sideways. During your survey, you should note vent locations, duct routes, ceiling joists, beams, and any fans that change air patterns.
- Plan for obstructions. Beams, open-web joists, soffits, and decorative ceiling elements create “shadow zones.” Those zones often require additional detectors or adjusted layouts.
Residential and commercial buildings still share the goal (early warning), but they differ in how people use the space and how the code approaches it.
In residential settings, placement typically focuses on waking occupants. That usually means detectors in sleeping areas, outside bedrooms, and on each level. Interconnection also matters because it ensures the warning travels fast through the home.
In commercial settings, placement depends more on occupancy behavior and hazards. A warehouse with high ceilings and big obstructions needs a different layout than a small retail shop. For a quick reference on how NFPA 72 placement thinking applies to smoke alarms, use NFPA 72 smoke detector requirements and guide.
Finally, do not treat detectors as “one size fits all.” If an area has persistent nuisance triggers (for example, cooking aerosols or heavy humidity), the solution might be a different device type, a different sensing method, or a different location strategy. If you skip that step, you will fight nuisance alarms after move-in.
A practical planning checklist before you buy hardware
Use this checklist to keep the design phase organized and to prevent costly redo work.
- Walk the building as if you were responding to an alarm. Identify where smoke would spread first, where it would get trapped, and where occupants would move.
- Map exits and escape routes. Detectors should trigger alerts that align with how people actually evacuate.
- Survey HVAC supply and return locations. Note air velocity patterns near ceilings and around rooms with ceiling fans or ducts.
- Measure ceiling height and ceiling obstructions. Confirm if ceiling spacing rules can apply as planned, or if engineered spacing is needed.
- List high-risk rooms and activity types. Consider kitchens, boiler rooms, garages, restrooms, and utility areas, because these drive detector selection.
- Determine whether this is residential or commercial planning. Occupancy changes expectations, wiring approach, power backup needs, and how nuisance is handled.
- Plan wiring paths and junction locations. A clean route now saves you from cutting walls later.
- Coordinate with the electrical scope early. Fire detection systems depend on power, supervision, and proper device circuits.
- Get permit and inspection requirements confirmed. Local jurisdictions often require specific submittals and testing forms.
- Verify the installer’s qualifications in writing. Ask what certifications apply to your system and building type.
- Schedule integration testing before close-up. Confirm smoke, control panel responses, and any linked building functions.
When you treat placement like a design task, not a punch-list, the install goes smoother. You also reduce repeat labor when inspections find spacing, airflow, or obstructions you missed.
Navigating Codes and Legal Requirements in 2026
Codes do not stand still, and 2026 planning needs extra attention if your fire detection system connects to the rest of the building. NFPA 72 is the base standard, but local codes can add stricter requirements, different adoption dates, or added submittal steps. For workplaces, OSHA also matters, because employers must meet workplace safety obligations that can point back to fire detection system design and maintenance.
Start by treating NFPA 72 as your “north star,” then verify what your jurisdiction requires.
NFPA 72 as the foundation, plus local rules on top
NFPA 72 guides device selection, installation methods, testing expectations, and operational behavior. However, local fire marshals and building departments can impose additional steps, like permit timing, acceptance tests, or required documentation formats.
That matters even more as systems become more connected. If your building uses linked operations (like elevator recall, door release where allowed, or building controls), you cannot assume the plan passes just because the devices mount correctly.
For a clear summary of what contractors watch for around the 2026 cycle, refer to NFPA 72 changes for 2026. Use it as a planning prompt, then confirm details in the adopted code set for your project.
Cybersecurity requirements for connected fire alarms
Connected systems can help response times, but they add rules that protect the building from unauthorized access. Recent NFPA 72 updates emphasize owner access and remote connection controls.
Plan for these cybersecurity items early:
- Owner access to system credentials. Installers must provide building owners access to their own systems, including passwords and codes.
- Remote access must be controllable. If remote access is used, someone must be able to shut it off at any time.
- Inactive remote sessions must end. If nobody uses a remote session, the system connection should stop automatically after a set period.
- Service scope must be managed safely. Parts of the system being serviced must be handled so the system does not become unsafe during work.
If your team treats cybersecurity like a paperwork task, it often comes back as a failed acceptance or an inspection hold. Instead, plan it like you plan wiring: assign responsibility, document access, and test the workflow.
Elevator links, HVAC interfaces, and what tests must prove
Fire detection systems often integrate with other building controls. Elevator recall is one common link, along with HVAC shutdown or interface signals, and sprinkler system monitoring (where applicable). NFPA 72 expects integration behavior to work during testing, not just “on paper.”
Also, do not ignore the wiring and phone-line type details where applicable. Integration errors tend to show up during commissioning, which is when delays get expensive.
Technician qualifications, documentation, and better records
A strong install depends on competent people and clear records. Recent NFPA 72-related changes increased expectations around documentation. For example, installers may need more detailed records, including splice and junction locations, not just the big components.
Meanwhile, for workplaces, OSHA can require employers to follow fire detection system design and installation duties tied to employee warning, alarm response, and safe evacuation. OSHA does not replace NFPA 72, but it can enforce similar outcomes through workplace safety requirements. You can see the OSHA fire detection system requirements in OSHA workplace fire detection rules.
Practical steps for 2026-ready planning include:
- Ask the contractor what certifications apply to your building type and device category.
- Confirm who performs system programming, testing, and acceptance sign-off.
- Require a submittal package that matches what inspectors expect.
- Plan integration tests with the trades involved (fire alarm, elevator contractor, and building controls team).
Permits, inspections, and hiring the right pros
Most projects need permits before installation starts. Local authorities typically require plans or cut sheets for detectors, control equipment, wiring methods, and power backup. After installation, you can expect inspection and testing. Some areas also require ongoing maintenance documentation.
When you hire a pro, your goal is simple: reduce the chance of a late failure. A good contractor will verify the layout against the code, coordinate with the electrical and controls scopes, and schedule testing before walls close.
If you skip permits or outsource without coordination, you often pay twice. Your first bill goes to installation, your second bill goes to corrections.
Step-by-Step Guide to Installing Fire Detection Systems
Installing a fire detection system is mostly careful work, then careful testing. If you treat placement and wiring like precision carpentry, the whole system tends to behave during alarms. On the other hand, if you skip planning, you often get nuisance trouble, failed inspections, and delays when seconds matter.
This section walks through the practical steps installers follow on real projects, from mounting devices to tying everything into the control panel and adding alerts.
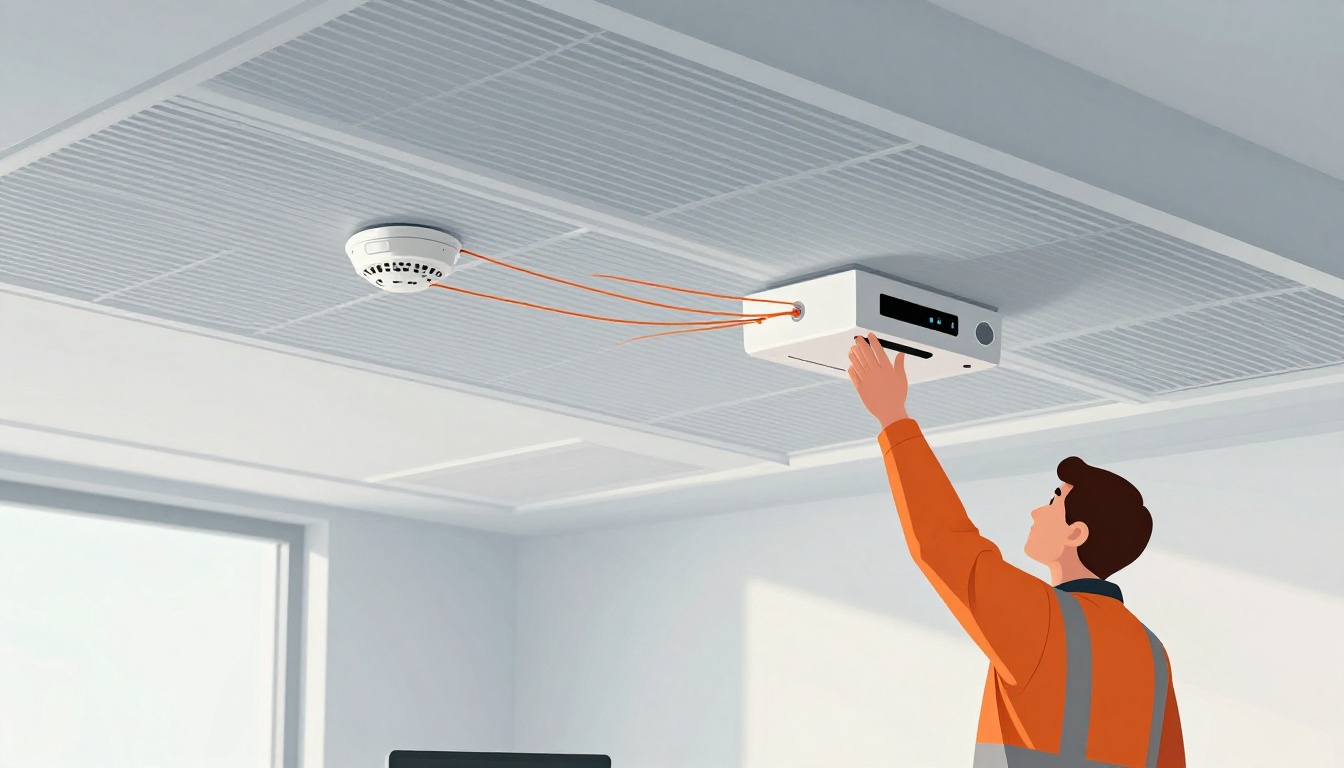
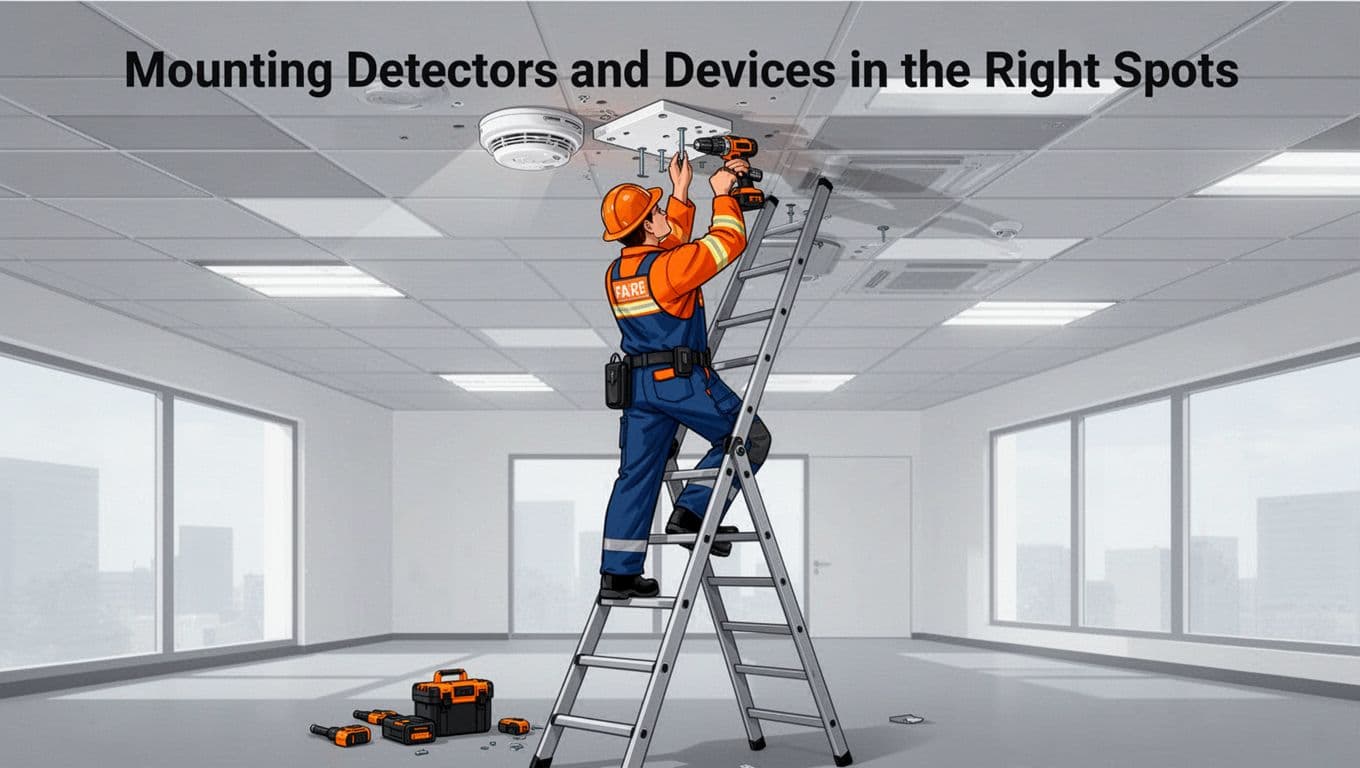
Mounting Detectors and Devices in the Right Spots
Start with the hardware location, not the screws. Detectors need a clear path to the smoke or heat they should sense. So before you drill, confirm the ceiling plan, check obstructions, and verify the routing paths for wiring (and any ASD pipe runs, where required).
Secure mounting plates at the right height and location
Mounting points create the foundation for every other step. First, place securing plates high on ceilings or walls based on the detector type and manufacturer instructions. Then use the right anchors and fasteners for the surface material, so the device stays tight under vibration and inspection.
For wall-mounted units, installers typically keep the device high on the wall, then confirm the required spacing from corners and edges. For ceiling-mounted detectors, they keep clear of sidewalls and corners and hold to the common offset used in NFPA 72 planning. If you’re working around rough ceilings or finishes, double-check before you close up anything.
Keep flame and thermal detectors in line-of-sight (when required)
Some detectors are picky. Flame and thermal technologies often require a better view of the hazard because smoke, beams, and tall obstructions can block or scatter signals.
Therefore:
- Avoid placing detectors behind ductwork, beams, or “shadow” obstructions.
- Confirm the sensor’s intended coverage is not cut off by soffits or equipment racks.
- If you use IR or flame detectors, verify the hazard remains within the device’s listed sight and response conditions.
Think of it like placing a camera. If there’s a shelf in the way, you can still install it, but it won’t “see” what it should.
Plan ASD pipe runs before you mount and finish
If your project uses ASD (air sampling detection) pipe or tubing, spacing and routing matter early. You want the pipe network to follow the design layout, without kinks, sharp turns, or runs that fight airflow.
So, do this before final trim-out:
- Route pipe or tubing to match the layout drawings.
- Maintain required supports and clearances.
- Confirm the sample holes and spacing match the manufacturer’s plan.
Also keep your wiring pathway separate when required, especially around fire-rated assemblies. When you plan this first, you avoid rerouting during installation, which usually means more labor and more inspection risk.
A helpful reference for placement height details for wall-mounted fire alarm equipment is NFPA’s installation heights fact sheet.
Attach detectors cleanly to avoid nuisance trouble
Once plates sit correctly, you attach detectors to the base. Use the right torque and alignment steps so the device locks in securely. Then inspect for things that cause headaches later: loose wiring leads, pinched conductor jackets, or dust inside detector bases.
Finally, label each device as you go, so the system layout matches the as-built record. Installers often treat labels like an afterthought, but inspections and troubleshooting punish guesswork.
If the building has a mix of detector types, keep them straight during mounting. Mixing up device models or base types can force rework during commissioning.
Wiring and Connecting Everything to the Control Panel
Wiring is where “it looks installed” turns into “it actually works.” So follow the code and the device listing, then use a clean, traceable circuit layout.
Before you pull a single wire, make sure you know which architecture you have:
- Conventional systems use zones or circuits.
- Addressable systems use device addresses on loops.
Both can be code-compliant, but the wiring and labeling expectations differ.
Use the right zoning method for conventional systems
With conventional fire alarm panels, you wire detectors and initiating devices to defined circuits. Those circuits act like zones. When an alarm happens, the panel reports the zone, not the exact device unless your system uses additional features.
Because of that, you need consistent mapping:
- Keep each circuit’s devices within the planned zone boundaries.
- Label the conductors so the zone matches the as-built drawing.
- Avoid cross-connections that can confuse zone reporting.
For many smaller buildings, conventional wiring is straightforward. Still, the panel must receive the correct signal type, in the right order, with proper supervision (so you can detect open or short conditions).
Wire addressable systems with correct loops and device addresses
Addressable panels work differently. The wiring often forms loops, and each device reports its own identity to the panel. As a result, the panel can tell you which device triggered.
So the wiring step includes both cable installation and address setup:
- Run the loop wiring per the manufacturer’s requirements.
- Maintain polarity and supervision rules exactly.
- Program each device address in a way that matches the device locations.
Then, after mounting and wiring, confirm the panel recognizes each detector and initiating device. This step prevents “dead devices” that only show up during final testing.
If you want a clear side-by-side look at how addressable and conventional wiring compare, see addressable vs conventional systems.
Plan for backups and supervision from day one
Most fire detection systems must keep working during power loss. That means backup power at the system level and supervised power continuity.
In practice, installers plan for:
- Panel standby power (typically batteries) with correct sizing.
- Emergency power connections where required.
- Proper supervision so the panel reports trouble if wiring fails.
Also, don’t treat wiring like a single run. Plan the pathway so you can inspect, test, and troubleshoot. Secure cable routes, protect conductors, and keep cable segments accessible where required.
Keep the panel location secure and accessible
Your control panel should sit in a protected area where it stays accessible to authorized staff. It also needs safe working clearances for programming, reset, trouble review, and inspection.
Choose a location that meets the project plan and code intent:
- Avoid placing the panel where it might get damaged by leaks or constant traffic.
- Keep it near power sources and approved conduit pathways.
- Ensure installers can reach it for service without cutting finished surfaces.
Then confirm the panel connects cleanly to notification appliances and any integration points. If you place the panel like it’s an afterthought, the whole building’s wiring plan becomes messy.
Follow code-compliant wiring methods (and don’t guess)
Fire alarm wiring is not where you “make it work.” Installers use code-compliant methods and follow listing requirements. If you’re running conductors through raceways, use the specified type (metal raceways or other approved methods). If you’re using armored cable, follow the approved installation rules.
Safety tips that save rework:
- Use the right wire gauge for the length and device load.
- Strip conductors cleanly, then land them securely at terminal points.
- Keep splices where allowed, and document them.
- Avoid loose terminations, because they can cause intermittent trouble.
Also remember: codes expect testing results to prove the system responds correctly. Good wiring makes testing fast.
For a deeper look at how conventional vs addressable choices affect installation details, this guide to conventional fire alarm systems can help you picture how zoning behaves in the real world.

In commercial work, it also helps to coordinate with the electrical trade early. Fire alarm systems often require tight coordination with power circuits, conduit routing, and mechanical penetrations. If you wait until the last day, you end up negotiating access while ceilings stay open.
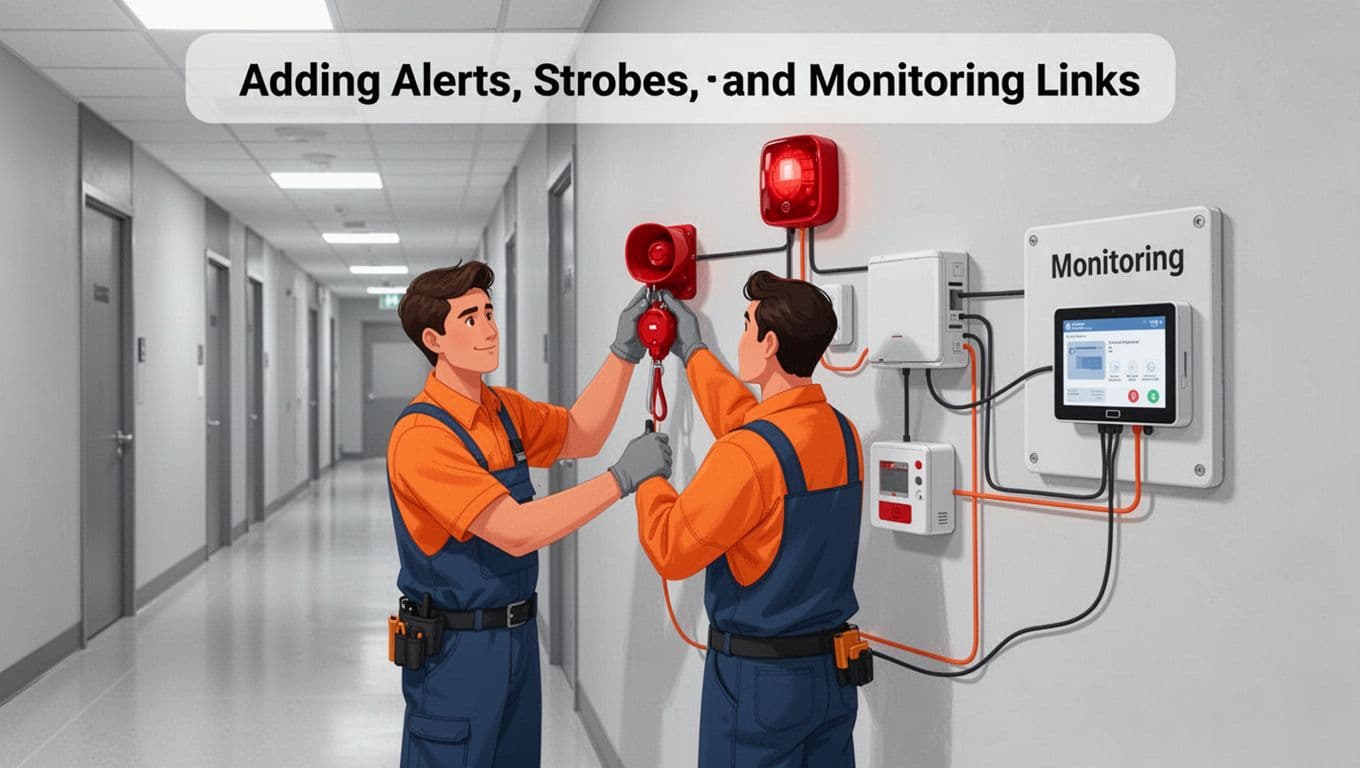
Adding Alerts, Strobes, and Monitoring Links
After detectors and initiating devices mount and wire into the panel, you add the part people actually notice: alerts. These include horns, speakers, strobes, and pull stations, plus optional silent signals for monitoring.
Think of notification devices like a loud megaphone. Placement and settings decide whether occupants hear the alarm, see it clearly, and know what to do next.
Install pull stations and ensure clear, reachable placement
Pull stations act fast. Install them where people can reach them during an emergency, usually in hallways or near exits, following height and location requirements.
During installation:
- Mount the box securely to the wall or backing.
- Connect initiating device wiring back to the panel terminals.
- Verify the station activates properly when tested.
NFPA guidance often references clear height rules. If you want an example of where those rules show up in industry discussions, see NFPA pull station installation height.
Mount horns, strobes, and visible alerts for full coverage
Notification appliance placement changes by space type and occupant flow. Install horns and speakers where they can meet required audibility, and mount strobes where they can provide clear visual signaling.
Key points installers follow:
- Avoid blocking strobes with signage, curtains, or tall objects.
- Keep the devices where people face them during evacuation.
- Match the notification layout to the room ceiling height and wall geometry.
Also, accessibility matters. Visual signals often require careful positioning to meet requirements. Installers typically confirm the intended settings during system commissioning, not during “first power.”
Connect monitoring for 24/7 service in commercial buildings
If a commercial building uses monitoring, the system sends alarm and trouble signals to an offsite monitoring center. That link can use dedicated paths depending on the system design and provider.
So, the installer should confirm:
- The monitoring format matches the panel’s approved signaling method.
- The panel can send and receive status signals correctly.
- Trouble signals get routed, not just alarm events.
Once the system is tied in, testing should include alarm transmission and trouble transmission. You want proof, not hope.
Integrate smart app features when the system supports it
Some modern fire systems include app integration. When those features exist, they let authorized users view status, receive alerts, and sometimes get trouble notifications on a phone.
However, app integration should not replace life safety requirements. Instead, treat it like a second notification layer:
- Confirm the app shows the right event types.
- Validate that remote notifications match the panel alarm behavior.
- Check the permissions and accounts so only authorized users can view or reset status.
For a practical walk-through of how fire alarm installs are handled end to end, this fire alarm installation step-by-step guide offers useful context for real job sequencing.
Test notification appliances so they work when it counts
Before close-up, test alarms the right way. Use the panel test mode and follow manufacturer and code procedures. Then verify:
- Horns and strobes activate in the correct areas.
- Sound levels meet design intent.
- Visual signals trigger with the right synchronization rules.
- Monitoring receives the correct signals.
If anything fails, fix it early. After walls close, corrections become expensive and slow, and the system loses the benefit of being fast and reliable.
Testing Your New System and Keeping It Reliable Long-Term
After installation, you don’t just “flip the switch” and hope. You prove the system responds the way it should. Think of testing like a final dress rehearsal. If something fails now, you fix it before people need it in real time.
Essential Tests to Confirm Everything Works
Start with a clear, step-by-step verification routine. Your goal is simple: prove detection, prove notification, prove power, and prove records. Then you confirm the system can guide evacuation without delays or confusion.
Use a structured sequence so nothing gets missed:
- Smoke test (smoke detectors). Introduce smoke to each device using the approved method for that detector type. This checks the sensing path, not just the “test button” behavior.
- Heat simulator (heat detectors). Apply the correct heat method for the detector listing. Make sure the panel registers the right point and the system goes into alarm mode.
- Battery and power tests. Verify the panel powers up normally, then confirm it has enough battery capacity. Also confirm supervision reports the right status if power changes.
- Annunciator and control panel check. Confirm alarms and troubles display the correct zones or device IDs. Watch the annunciator lights carefully, not just the main panel screen.
- Audibility checks. For notification appliances, confirm sound reaches intended areas. If the system uses speakers, verify intelligibility per design intent.
- False alarm and nuisance checks. Trigger tests away from normal daily sources (cooking vapors, dust, steam). After testing, monitor for recurring trouble events and verify the system stabilizes.
Once you finish, run a full evacuation simulation. In practice, that means confirming the system activates notification appliances throughout the building and that staff follow the expected alarm response plan. Documentation matters here, too. NFPA 72-aligned ITM records help you pass acceptance checks and defend your maintenance history. For guidance on testing and parts replacement focus areas, see NFPA 72 inspection: parts replaced.

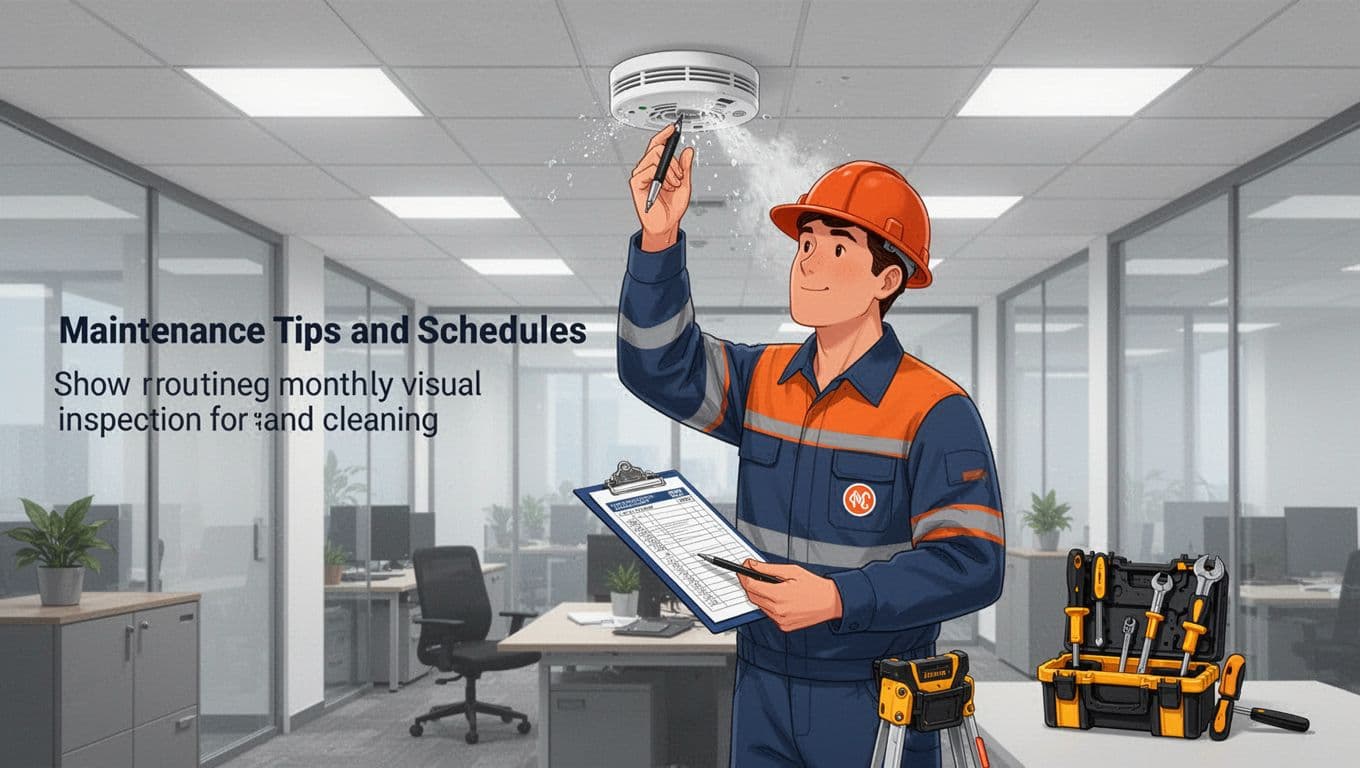
Maintenance Tips and Schedules for Ongoing Safety
Testing is your proof. Maintenance is what keeps that proof true year after year. When people skip maintenance, the system often still “looks fine” but loses reliability in small ways.
A good approach matches the schedule to the risks and to NFPA 72 expectations. As a baseline, many buildings follow annual testing for detectors, pull stations, notification appliances, and control equipment. Some buildings also require more frequent testing depending on occupancy and local enforcement. For a quick reference on testing cadence, use How often fire alarms must be tested.
Build your maintenance routine around repeatable tasks:
- Monthly (quick look): Inspect device housings for dust, damage, and paint overspray. Check for obvious tampering and confirm no persistent trouble signals show up.
- Quarterly to semi-annual (site behavior): Look at high-nuisance areas, like break rooms or parking garages. If those zones keep triggering trouble, the system may need cleaning or configuration review.
- Annual (proper testing): Test every relevant device using approved methods. Confirm annunciation, alarm routing, monitoring signals, and power continuity.
- Cleaning detectors: Vacuum or clean components only as permitted by the manufacturer. Avoid random sprays or “general household cleaning.”
- Smart device updates: For smart-connected units, update software only through the approved update process. Then confirm the system still communicates correctly after the update.
- Record everything: Track inspection dates, what got tested, what was replaced, and any trouble history. Good records turn future troubleshooting into a fast fix, not a guess.
Also plan for replacement timelines. Smoke detectors generally need replacement within a manufacturer’s service life, often around 10 years, because components drift with age even when they still pass basic checks. If your system includes other building integrations, schedule joint reviews for sprinkler monitoring and CO systems (where used) so you don’t discover incompatibilities later.
Common Installation Mistakes That Could Cost Lives and How to Avoid Them
It only takes one bad decision to turn a fire detection system into a hopeful guess. When placement, wiring, or testing goes wrong, you lose the first warning (and you might delay the second). That gap can be the difference between people getting out calmly and chaos starting fast.
Below are the most common install mistakes, why they matter, and what to do instead. Use this like a reality check during design reviews, rough-ins, and final acceptance.
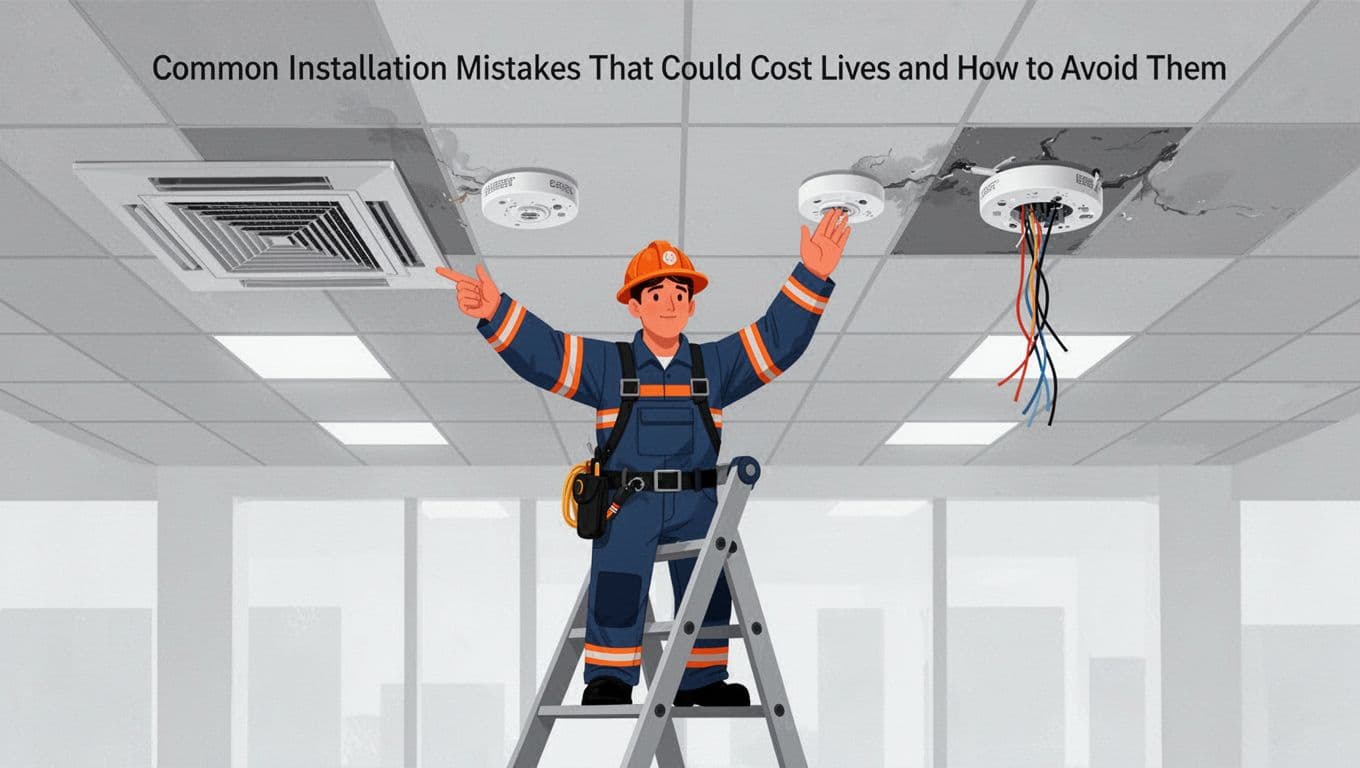
Bad detector placement that creates blind spots or false alarms
Mistake: wrong detector placement. This is the most common issue because it looks “close enough” until you test it. Detectors can miss real smoke due to airflow patterns, ceiling obstructions, or bad spacing. On the flip side, they can false alarm when they sit too near kitchens, vents, or windows.
Why does this cost lives? In a real fire, smoke follows airflow and physics, not the drawing on a plan sheet. One mislocated detector can mean the system warns late, or not at all, in the room where people need it first.
Fix it by treating layout like design, not decoration:
- Follow the approved plans and the device spacing rules for your ceiling type.
- Keep detectors away from strong airflow paths (supply outlets, return grilles, ceiling fans).
- Account for beams, soffits, and ducts that block smoke movement.
- Use the right sensor type for the room. For example, steam-heavy areas often need careful device selection.
If you want a focused refresher on smoke alarm placement basics, review the guidance in NFPA 72 smoke detector requirements and guide. It helps you see how placement links directly to performance.
Poor wiring, labeling, and supervision that fail during real events
Mistake: poor wiring. Bad terminations, wrong cable types, loose connections, and mislabeled circuits can create intermittent trouble, dead devices, or delayed alarms. In an emergency, intermittent faults behave like ghosts. They disappear during testing, then show up when you need proof most.
Also watch for these common wiring failures:
- Wrong polarity or loop behavior on addressable systems.
- Unsupervised wiring where supervision is required.
- Cross connections that make the panel report the wrong location.
- Unprotected pathways that get damaged during construction or later remodel work.
Fix it by building in traceability from day one. When installers label each device and circuit clearly, testing becomes faster and troubleshooting becomes less of a guessing game. In addition, correct supervision and power design means the panel can report faults instead of hiding them.
If you’re trying to prevent “it passed once” surprises, use a structured approach similar to the sequence outlined in a step-by-step fire alarm installation guide. The goal is simple: every wire lands correctly, and every circuit proves it works.
Skipping tests (or doing only “button tests”) before acceptance
Mistake: skipping tests or doing partial tests. Pressing the test button feels safe. Yet it only proves the button and the panel response. It does not prove the detection path, the sensor sensitivity, or the notification pattern that occupants rely on.
Testing gaps commonly show up like this:
- A detector reports “test” but fails to alarm under real smoke conditions.
- Notification devices activate in one area, but not across all required coverage zones.
- Monitoring links do not send trouble or alarm signals correctly.
Fix it with verification that matches the system’s job. Do smoke and heat verification using the right approved method for each detector type, then confirm:
- Alarm initiation and correct location reporting.
- Notification appliances operate in the right areas.
- Monitoring transmits alarms and troubles, not just alarms.
- Records and as-built labels match what you installed.
A quick mindset shift helps: testing is a dress rehearsal. If the rehearsal misses key scenes, the performance fails.
Using unqualified installs, ignoring codes, or mishandling cybersecurity for connected systems
Mistake: unqualified installers and ignoring codes (including cybersecurity). When the installer lacks the right experience, problems spread across multiple areas: poor documentation, sloppy wiring choices, missed inspection expectations, and weak commissioning. Then, cybersecurity issues can become a separate failure mode, especially in systems that support monitoring, remote access, or cloud features.
In recent updates, NFPA 72-related expectations for connected systems stress owner access and controlled remote behavior. If remote access gets treated like an afterthought, you can end up with locked-out owners, unmanaged credentials, or unsafe session handling. For a practical look at what contractors need to know, see NFPA 72 changes for 2026.
Fix it by tightening the process:
- Verify the installer’s qualifications for your building type and device category.
- Confirm the system design matches adopted code and local authority requirements.
- Build a cybersecurity plan into commissioning, not into a post-project “someday” task.
- Deliver clear documentation so owners can maintain the system and prove compliance.
When you avoid these mistakes, the benefits show up quickly. You get earlier warning, fewer nuisance trips, faster testing, smoother inspections, and better trust from occupants and facility teams. Most importantly, you help ensure the system performs under pressure, not just on paper.
Conclusion
A solid fire detection system install starts with correct planning, then precise mounting and wiring, and ends with real testing that proves the full chain of action. When the layout matches airflow, ceilings, and obstacles, the system warns sooner and helps people leave safely.
For best results, schedule a site survey and hire a certified fire alarm contractor who follows NFPA 72 and your local code. Pay special attention to 2026-ready needs like cybersecurity for networked alarms and updated rules around smoke detector performance (including ceiling limits), so the system stays reliable as buildings and tech change.
If you want this topic to stay practical, review your current device placement, ask how commissioning will verify alarm, trouble, and monitoring signals, and confirm your maintenance plan. Which part of installation do you want to get right first, detector placement, wiring, or testing?